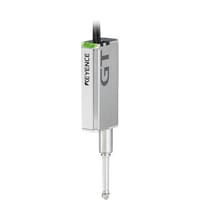
Sensor Head
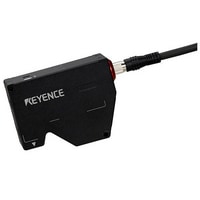
Keyence LJ-V7020K
High-speed 2D/3D Laser Profiler LJ-V7000 series
Categories: Laser Profiler, Measurement Sensors
GET A PRICE
To receive a proposal, please send your request to info@sensors-trade.com and specify the required positions and company details.
Specification
| Model | LJ-V7020K*1 | |
| Mounting conditions | Specular reflection | |
| Reference distance | 24.2 mm | |
| Measurement range | Z-axis (height) | ±2.3 mm (F.S.=4.6 mm) |
| X-axis (width) | NEAR side | 6.5 mm |
| Reference distance | 7 mm | |
| Far side | 7.5 mm | |
| Light source | Type | Blue semiconductor laser |
| Wavelength | 405 nm (visible beam) | |
| Laser class | Class 2M Laser Product*2 (IEC60825-1, FDA(CDRH) Part 1040.10*3) | |
| Output | 10 mW | |
| Spot size (reference distance) | Approx. 14 mm × 35 µm | |
| Repeatability | Z-axis (height) | 0.2 µm*4*5 |
| X-axis (width) | 2.5 µm*4*6 | |
| Linearity | Z-axis (height) | ±0.1% of F.S.*7 |
| Profile data interval | X-axis (width) | 10 µm |
| Sampling cycle (trigger interval) | Top speed: 16 µs (high-speed mode), Top speed: 32 µs (advanced function mode)*8 | |
| Temperature characteristics | 0.01% of F.S./°C | |
| Environmental resistance | Enclosure rating | IP67 (IEC60529)*9 |
| Ambient light | Incandescent lamp: 10,000 lux max.*10 | |
| Ambient temperature | 0 to +45 °C*11 | |
| Relative humidity | 20 to 85 % RH (No condensation) | |
| Vibration resistance | 10 to 57 Hz, Double amplitude 1.5 mm, 3 hours in each of the X, Y, and Z directions | |
| Shock resistance | 15 G/6 ms | |
| Material | Aluminium | |
| Weight | Approx. 410 g | |
| *1 The double polarisation function cannot be used. *2 Do not look into the beam directly using any optical instruments (such as eye loupes, magnifiers, microscopes, telescopes, or binoculars). Viewing the laser output with an optical instrument may pose an eye hazard. *3 The laser classification for FDA(CDRH) is implemented based on IEC60825-1 in accordance with the requirements of Laser Notice No. 50. *4 This value is from a case in which measurement has been performed with a reference distance with 4,096 times of averaging. *5 The measurement targets are KEYENCE standard targets. This value is from a case in which the average height of the default setting area has been measured in height mode. All other settings are default. *6 The measurement target is a pin gauge. This value is from a case in which the position of the intersection between the rounded surface of the pin gauge and the edge level has been measured in position mode. All other settings are default. *7 The measurement targets are KEYENCE standard targets. The profile data is from a case in which measurement has been performed with 64 times of smoothing and 8 times of averaging. All other settings are default. *8 For high-speed mode, when the measurement area is at its minimum, binning is ON, image capture mode is set to standard, and parallel image capture is ON. All other settings are default. For advanced function mode, when the measurement area is at its minimum, binning is ON and image capture mode is set to standard. All other settings are default. *9 This value is from a case in which the sensor head cable (CB-B*) or extension cable (CB-B*E) has been connected. *10 This is the illuminance for the light-receiving surface of the sensor head during white paper measurement when light has been shined onto the white paper. *11 The sensor head must be mounted on a metal plate for use. |


